DIY Charcuterie Cups: The Incredible 7-Step Guide
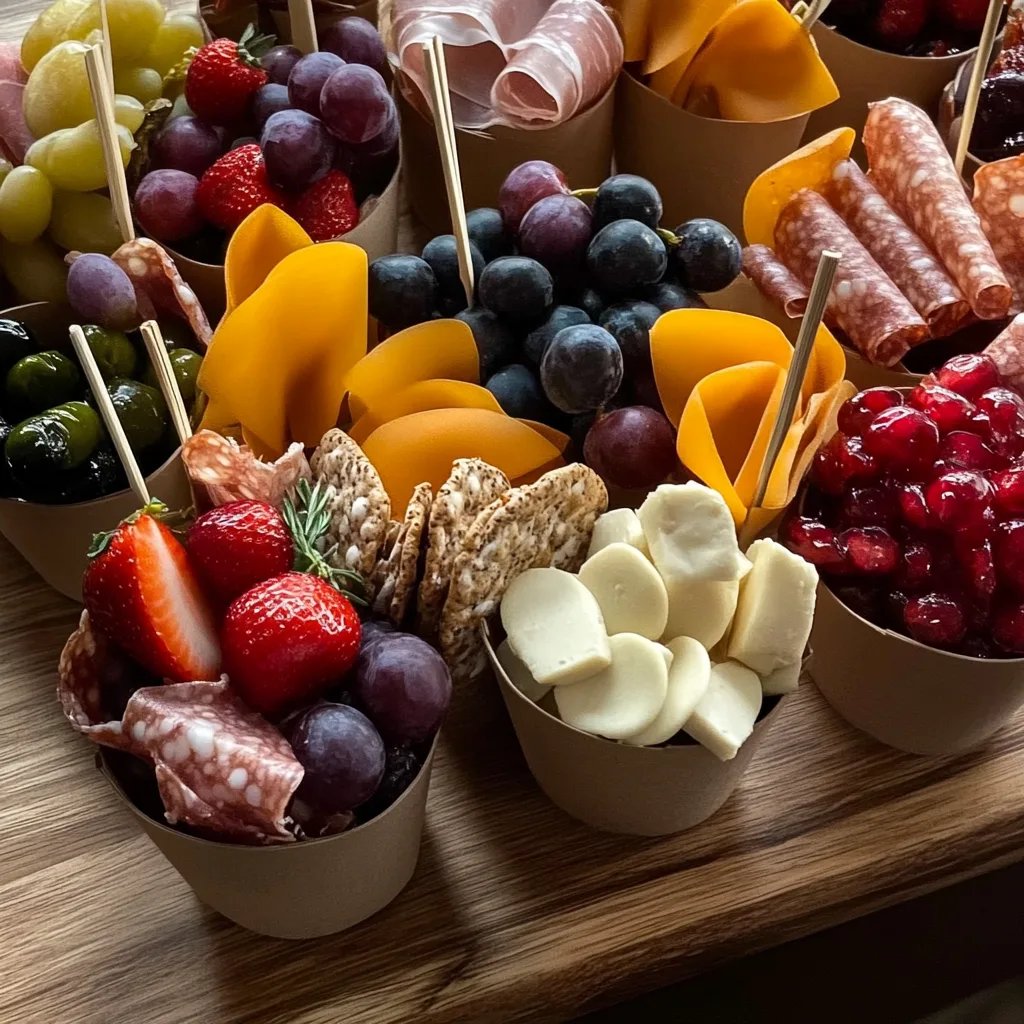
DIY Charcuterie Cups offer a wonderful way to present bite-sized delights for any occasion. These portable, individual servings are perfect for parties, picnics, or even cozy family nights. Crafted to please and inspire, they are a perfect balance of savory, sweet, and crunchy textures that tantalize the taste buds. Imagine a classic charcuterie board, but in a convenient cup, allowing everyone to enjoy a fantastic mix of flavors without any fuss. This article will guide you through creating these delightful mini boards, ensuring your gatherings are memorable and delicious.
The excitement of DIY Charcuterie Cups lies in their versatility. Each cup can be customized to suit different tastes, dietary preferences, and themes. Whether you want to impress your guests with a vibrant array of colors or keep it simple yet elegant, the possibilities are endless. Through this guide, you will learn why these cups are a must-try, how to prepare them efficiently, and assorted serving ideas to make your event truly special.
By the end of this article, you will be eager to create your own DIY Charcuterie Cups and amaze your friends and family with your culinary creativity. Let’s dive into what makes these delightful confections so appealing!
Why You’ll Love This Recipe
There are several reasons why DIY Charcuterie Cups will become your go-to for entertaining. Here are some amazing highlights:
1. Customizable: Tailor each cup to reflect your style or the preferences of your guests. You can mix and match different ingredients effortlessly.
2. Portable: These cups can be easily transported, making them ideal for picnics, potlucks, or outdoor gatherings.
3. Less Mess: No need for cutting boards or large platters; each person has their own serving size to enjoy.
4. Visual Appeal: The vibrant colors and thoughtful arrangements of ingredients not only taste great but also look stunning.
5. Quick Preparation: Assemble these cups in a matter of minutes, allowing you more time to relax and enjoy your event.
6. Variety for Everyone: Cater to different dietary needs easily, whether they be vegetarian, gluten-free, or meat lovers.
7. Impressive Presentation: Your guests will be wowed by this creative twist on a classic charcuterie board.
With these advantages, it’s no wonder DIY Charcuterie Cups have become increasingly popular for events ranging from casual family dinners to lavish parties.
Preparation and Cooking Time
Creating DIY Charcuterie Cups is a quick and enjoyable process. Here’s a breakdown of how long it takes:
– Preparation Time: 20-30 minutes
– Assembling Time: 15 minutes
– Total Time: 35-45 minutes
This simple yet delightful recipe is designed to fit into your schedule and leave you feeling accomplished in no time.
Ingredients
– 1-2 types of cured meats (salami, prosciutto, or pepperoni)
– 1-2 types of cheeses (cheddar, brie, or gouda)
– Fresh fruits (grapes, apple slices, or berries)
– Crunchy snacks (crackers, breadsticks, or pretzel sticks)
– Fresh vegetables (carrots, cherry tomatoes, or cucumber slices)
– Dips or spreads (hummus, fig jam, or mustard)
– Fresh herbs for garnish (optional)
Step-by-Step Instructions
Creating your own DIY Charcuterie Cups is a breeze with these straightforward steps:
1. Gather Your Supplies: Collect all the ingredients and necessary supplies such as cups, utensils, and cutting boards.
2. Prepare the Ingredients:
– Slice cheeses into bite-sized pieces or cubes.
– Cut cured meats into various shapes (triangles or rolled).
– Wash and slice fresh fruits and vegetables accordingly.
3. Choose Your Cups: Decide on the type of cups you want to use. Clear plastic cups, small mason jars, or even waffle cones work well.
4. Layering the Ingredients:
– Begin with a base. Start by placing a small amount of dip or spread at the bottom of each cup.
– Add a protein layer by arranging slices of cured meats on one side or center of the cup.
5. Add the Cheese: Next, add the pieces of cheese alongside the meat, ensuring it’s visible for an aesthetic look.
6. Showcase Fresh Produce: Incorporate colorful fruits and fresh vegetables. Create a balance by ensuring a mix of different colors and textures.
7. Finish with Crunchy Treats: Top off each cup with crunchy snacks like crackers or breadsticks for added texture and flavor.
How to Serve
Serving DIY Charcuterie Cups can raise the overall experience. Here are some creative ideas on how to make the presentation memorable:
1. Display in Groups: Arrange cups on a large platter or tiered stand for a visually appealing display. Vary the heights for more intrigue.
2. Add Flowers or Greens: Place small flower blooms or sprigs of herbs around the cups to enhance the visual appeal.
3. Personal Touch: Use decorative labels or name cards for each cup, highlighting ingredients for dietary considerations or preferences.
4. Serve with Mini Utensils: Include small forks or toothpicks for easy tasting. This will make the cup more accessible and enjoyable.
5. Theme Your Presentation: Consider different themes for holidays, seasons, or specific cuisines. Adjust colors, ingredients, and decorations accordingly.
By spending extra time on how you serve these DIY Charcuterie Cups, you create an inviting atmosphere that encourages guests to indulge in delightful experiences. Each cup tells its own delicious story, turning any gathering into a celebrated event. Embrace your creativity, and let these captivating creations shine!
Additional Tips
– Use Seasonal Ingredients: Incorporate seasonal fruits and vegetables to keep your DIY Charcuterie Cups fresh and vibrant.
– Mix Textures: Combine creamy cheeses with crunchy nuts or vegetables to create an interesting eating experience.
– Experiment with Dips: Try different dips or spreads to add unique flavors to your cups, such as spicy salsas or tangy dressings.
– Consider Dietary Needs: Always check with your guests about dietary restrictions to ensure everyone can enjoy your creations.
– Garnish with Herbs: A sprig of fresh herbs can elevate the aesthetic appeal and add an aromatic touch to the cups.
Recipe Variation
Feel free to get creative! Here are some exciting variations to try:
1. Breakfast Cups: Fill cups with mini bagels, cream cheese, smoked salmon, and capers for a brunch-inspired take.
2. Dessert Cups: Use sweet elements like chocolate-covered pretzels, fruit, and flavored cream cheese for a delightful dessert option.
3. Mediterranean Style: Incorporate items like feta cheese, olives, hummus, and pita chips for a Greek-inspired flavor blend.
4. Taco Cups: Layer taco ingredients such as seasoned ground meat, guacamole, salsa, and cheese for a fun twist.
Freezing and Storage
– Storage: Keep assembled cups covered in the refrigerator if not serving immediately. They will stay fresh for up to 24 hours.
– Freezing: Charcuterie Cups are best enjoyed fresh. However, you can store leftover components individually in airtight containers for up to a week.
Special Equipment
While you don’t need sophisticated tools, these essential items can make the preparation easier:
– Clear Plastic Cups or Mason Jars: For holding the ingredients.
– Sharp Knife: To slice and prepare the meats, cheeses, and vegetables.
– Cutting Board: A safe area to chop ingredients.
– Small Spoons or Tongs: For easy serving and transferring ingredients.
Frequently Asked Questions
What types of cups can I use for DIY Charcuterie Cups?
You can use clear plastic cups, small glass jars, or even waffle cones for a fun twist.
Can I prepare these cups in advance?
Yes, you can prep the ingredients a day ahead; however, assemble the cups closer to serving time to maintain freshness.
Are DIY Charcuterie Cups suitable for vegetarians?
Absolutely! You can easily create vegetarian cups with assorted cheeses, fruits, vegetables, and dips.
How do I customize the cups for dietary restrictions?
Be sure to ask your guests about any allergies or dietary preferences and adjust the ingredients accordingly.
Conclusion
DIY Charcuterie Cups are an exciting, versatile, and visually striking way to delight guests at any gathering. Their customizable nature allows for endless creativity, ensuring there’s something for everyone to enjoy. This innovative presentation not only simplifies serving but also enhances the overall aesthetic of your event. Once you master the art of assembling these cups, you’ll find them to be a hit at your parties. Embrace the joy of creating distinct flavor profiles and beautifully layered designs, and watch as your DIY Charcuterie Cups steal the show!